Baseline Network
Accessibility calculations will be based on transport networks that is set up in your region. Transport networks includes scheduled transit service as well as the region's streets, sidewalks, bikeways, etc. Initially you will set up a baseline network. Later on you will likely want to compare alternative scenarios by creating modifications to the baseline network.
Setting up a new region
The region is a bounding box defining the area to be used for accessibility calculations. It should generally cover the entire service area of the agency or agencies you will be working with. Opportunities and network components outside this area will generally not be considered.
The regions page, shown after you log in, provides a list of existing regions (if any), and the option to create a new region. It is also accessible at any later point by clicking the globe icon (). From the regions page, set up a new region by clicking: Set up a new region
Start by using the search bar (activated with the in the upper right of the map pane) to locate your city or country by name. You can also move the bounding box by dragging its corners on the map or by manually entering coordinates in the sidebar.
Enter a name for the region and an optional description. To finalize region creation, click the button at the bottom of the panel. You should then be prompted to create a network bundle.
Creating a network bundle
Conveyal Analysis requires a network bundle, which consists of street and transit data.
To create a network bundle, click on the Network Bundles icon (), then click: Create a new network bundle
In the panel to create a new network bundle, first enter a name. We recommend staying organized by basing the name on the time period and/or services included, such as "April 2020 - Transit and Commuter Rail Feeds."
You can then specify whether your new bundle's street data (OSM) and transit data (GTFS) should be re-used from existing data, or based on new data that you upload.
Preparing the OSM data
OpenStreetMap (OSM) extracts define the street layer of the baseline transport network. This layer will be used for any walking or biking segments of a trip as well as for some transfers between stops and stations.
If you or your team has previously created network bundles in this region, you can select any one of them to re-use its OSM for your new bundle.
If there are no previously created network bundles, or if you want to use updated OSM data, you will need to upload a new OSM file. Note that while several formats exist for OSM data, Conveyal requires uploads in the PBF format because it is more compact and faster to process. The following sub-sections include detailed suggestions on preparing OSM PBF data for upload.
Downloading
Extracts from the global OSM database can be downloaded in many different ways. For most regions, we recommend OSM by the Slice, a service that provides up-to-date OSM extracts in the required PBF format. If you need a region that is too large for this service, Geofabrik provides easy downloads for entire countries and other selected regions. In either case, your extract should cover your entire service area or region, but not extend unnecessarily far beyond it as that may cause computation to stall.
Cropping
Performing accessibility analysis with excessively large OSM data can lead to significant increases in computation time and complexity. We strongly recommend cropping the data if they cover an area significantly larger than your transportation network or opportunity data. If you need assistance, please contact your support team. If you are comfortable working with the Unix shell, consider these tools for cropping operations:
- Osmosis is a multi-platform Java tool that works on Windows, Linux, and MacOS.
- OSMConvert is a fast tool pre-built for Windows and Linux and available on MacOS and Linux as part of the
osmctoolspackage. - Osmium-Tool is a personal favorite that is extremely fast but only straightforward to install on Linux and MacOS platforms.
Below are some example crop commands for these different tools. You'll need to replace input.osm.pbf with the name of your downloaded PBF file and change the coordinates of the area to clip to.
When uploading new OSM, the network bundle creation panel will show osmconvert and osmosis commands pre-filled with the current regional bounding box. If you have either of these tools installed locally, you can paste this command into your local command line and modify the filenames to crop your OSM data to regional boundaries before upload.
Osmosis:
osmosis --read-pbf input.osm.pbf \
  --bounding-box left=-79.63 bottom=43.61 right=-79.12 top=43.83 \
  --write-pbf cropped.osm.pbf
OsmConvert:
osmconvert input.osm.pbf \
  -b=-79.63,43.61,-79.12,43.83 --complete-ways -o=cropped.osm.pbf
Osmium-Tool:
osmium extract \
  --strategy complete_ways --bbox -79.63,43.61,-79.12,43.83 \
  input.osm.pbf -o cropped.osm.pbf
The latter two commands expect bounding boxes to be specified in the format min_lon,min_lat,max_lon,max_lat. We frequently find bounding boxes using the convenient Klokantech bounding box tool. Selecting the "CSV" format in the lower left will give exactly the format expected by these tools. You can also adapt the bounding box values shown in the region setup panel of Analysis.
Note that files larger than 500MB may be rejected on upload. Please contact your support team if you genuinely need to upload a file of this size, or need assistance in cropping and filtering OSM data.
Filtering
OpenStreetMap contains a lot of data besides the streets, paths, and platforms we need for accessibility analysis. As of this writing more than half of the ways in OSM are buildings, and slightly less than a quarter are roads or paths. Filtering out unneeded data will reduce your file size and speed the upload and processing by Analysis. As in the previous section, sample commands are provided below that will remove any unnecessary tags and should dramatically reduce the output file size.
Osmosis:
osmosis \
  --read-pbf input.osm.pbf \
  --tf accept-ways highway=* public_transport=platform railway=platform park_ride=* \
  --tf accept-relations type=restriction \
  --used-node \
  --write-pbf filtered.osm.pbf
Osmium-Tool:
osmium tags-filter input.osm.pbf \
  w/highway w/public_transport=platform w/railway=platform w/park_ride r/type=restriction \
  -o filtered.osm.pbf
Uploading GTFS feeds
If your new network bundle will not be re-using previously uploaded GTFS, start by gathering gtfs feeds for the transit agencies whose service you want to include. A GTFS feed is a set of CSV files inside a .zip archive.
Once these files are gathered on your computer, select the .zip files to upload in the "Upload new GTFS" tab of the network bundle creation panel. You can select multiple GTFS feeds in the file dialogue by shift-clicking, control-clicking or command-clicking (depending on your browser/operating system).
Again, note that files larger than 500MB may be rejected on upload. The largest GTFS feeds in regular use are below 400MB and most are much smaller than this. A larger file may indicate a problem. Please contact your support team if you genuinely need to upload a larger file.
If there is no GTFS available for your region you can, as a workaround, create a blank slate by using a valid GTFS feed from somewhere else in the world. After creating a project as described below, you can then attempt to import modifications from a shapefile representing service in your region.
Ensure any GTFS you upload follows requirements of the specification. Various validation tools are available. Common issues include:
- Missing required files
- Calendar dates that do not cover an intended date of analysis
Conveyal's routing engine:
- Maps an extended set of transport modes, including some derived from TPEG, to the original set of GTFS
route_typevalues. For example,route_typevalues 706 (Post Bus Service) and 11 (Trolleybus) are mapped to Bus; 405 (Monorail) and 12 (Monorail) are mapped to Tram. For details, see related code in R5. - Treats all GTFS trips represented in frequencies.txt as unscheduled frequencies (
exact_times = 0). If any of your feeds has a frequencies.txt file with values of 1 in theexact_timescolumn and you'd like to learn more, please contact your support team.
Advanced bundle configuration
These advanced configuration JSON options are hidden by default and should be modified only after consulting your support team. Once a network bundle is built, these options cannot be changed.
"buildGridsForModes":Additional on-street modes (other than walk) for which to pre-build large data tables (defaults to["WALK"]). Setting this to["BICYCLE", "CAR"]will eliminate repeated re-building of these tables when subsequent routing servers start up but require extra time when the network is first built. To keep this extra time reasonable, especially for car tables, minimize the number of transit stops included in the bundle's GTFS feeds. Attempting to build car tables for large regions with more than 24k stops will likely exceed various computation limits in the Conveyal platform, triggering errors."modifications":Modifications to include permanently in this network bundle (defaults to[]). This option is useful if you have modifications or data (such as custom levels of traffic stress or elevations for slope-sensitive routing) that you always want included as part of the baseline network."stepFree": Whether to exclude pedestrian traversal of ways with highway=stairs tags and nodes with kerb=raised tags. This option should generally be used with detailed sidewalk networks and a TraversalPermissionLabeler that forces use of sidewalks (restricts walking on most driving ways, see below)."maxIncline": Steepest allowable slope for traversal, currently implemented only for pedestrians and with"traversalPermissionLabeler":"noSteepInclines"(see below)"traversalPermissionLabeler":Which rules to use when setting mode-specific permissions on OSM ways. Available experimental labelers include:"sidewalk"restricts walking on most driving ways (useful for networks with complete sidewalks)"noSidewalkCycling"prohibits cycling on sidewalks"noSteepInclines"restricts walking on most driving ways and on ways with a custominclinevalue (generally from a special data source such as OpenSidewalks or GATIS) that exceeds the specifiedmaxInclinevalue (above)
"transfers":How to calculate stop-to-stop transfer times. Other specific transfers types like route-to-route and trip-to-trip are not compatible with our current routing approach, so will be ignored with a warning. When using values from GTFS transfers.txt files, we rely onmin_transfer_timevalues and only import transfer type 2 ("minimum amount of time between arrival and departure to ensure a connection"). For any option except OSM_ONLY, these GTFS transfers override and replace any OSM street distance calculations. Options include:"OSM_ONLY"Find transfers only by searching through the OSM street network, with stops linked to the nearest street network edge, ignoring GTFS transfers (default behavior)"GTFS_ONLY"Load transfers only from GTFS transfers.txt, do not use the OSM street network (experimental)"STOP_TO_PATTERN"Use OSM where GTFS does not provide a transfer from a given stop to a given trip pattern (experimental)"STOP_PAIR"Find transfers via streets for any pair of stops not connected by a GTFS transfer (experimental)
Finalizing network bundle creation
After you have specified a name for the network bundle, OSM data to re-use or upload, and GTFS feeds to re-use or upload, click the create button to confirm. You will need to wait a few minutes for Conveyal to process these data.
Creating a Project
Uploading and processing a network bundle may take several minutes. Once processing is complete, you should be able to create a new project based on the bundle you uploaded. If you aren't on the projects page already, click the project icon () and then click Create new Project
A project is essentially a wrapper around a bundle which associates it with any scenarios and modifications you may create later on. The purpose of projects is to allow multiple users to work simultaneously on the same baseline network without stepping on each other's toes. The section on managing modifications describes how modifications can be shared between projects that are based on the same bundle. Once created, the bundle associated with a project cannot be changed.
Give the project a descriptive name, select a bundle to which the project will be associated, and click the create button to confirm. You are now ready to move on to editing scenarios.
Viewing a built network bundle
When viewing a built network bundle, the Network Viewer map allows you to view details of its street and transit layers. For example, if you want to view cycling level of traffic stress (LTS) attributes of the baseline network, switch the toggle for "Street Layer" on and click "View Street Layer." Once a server loads the network bundle, you can set street links to be styled based on LTS or other attributes.
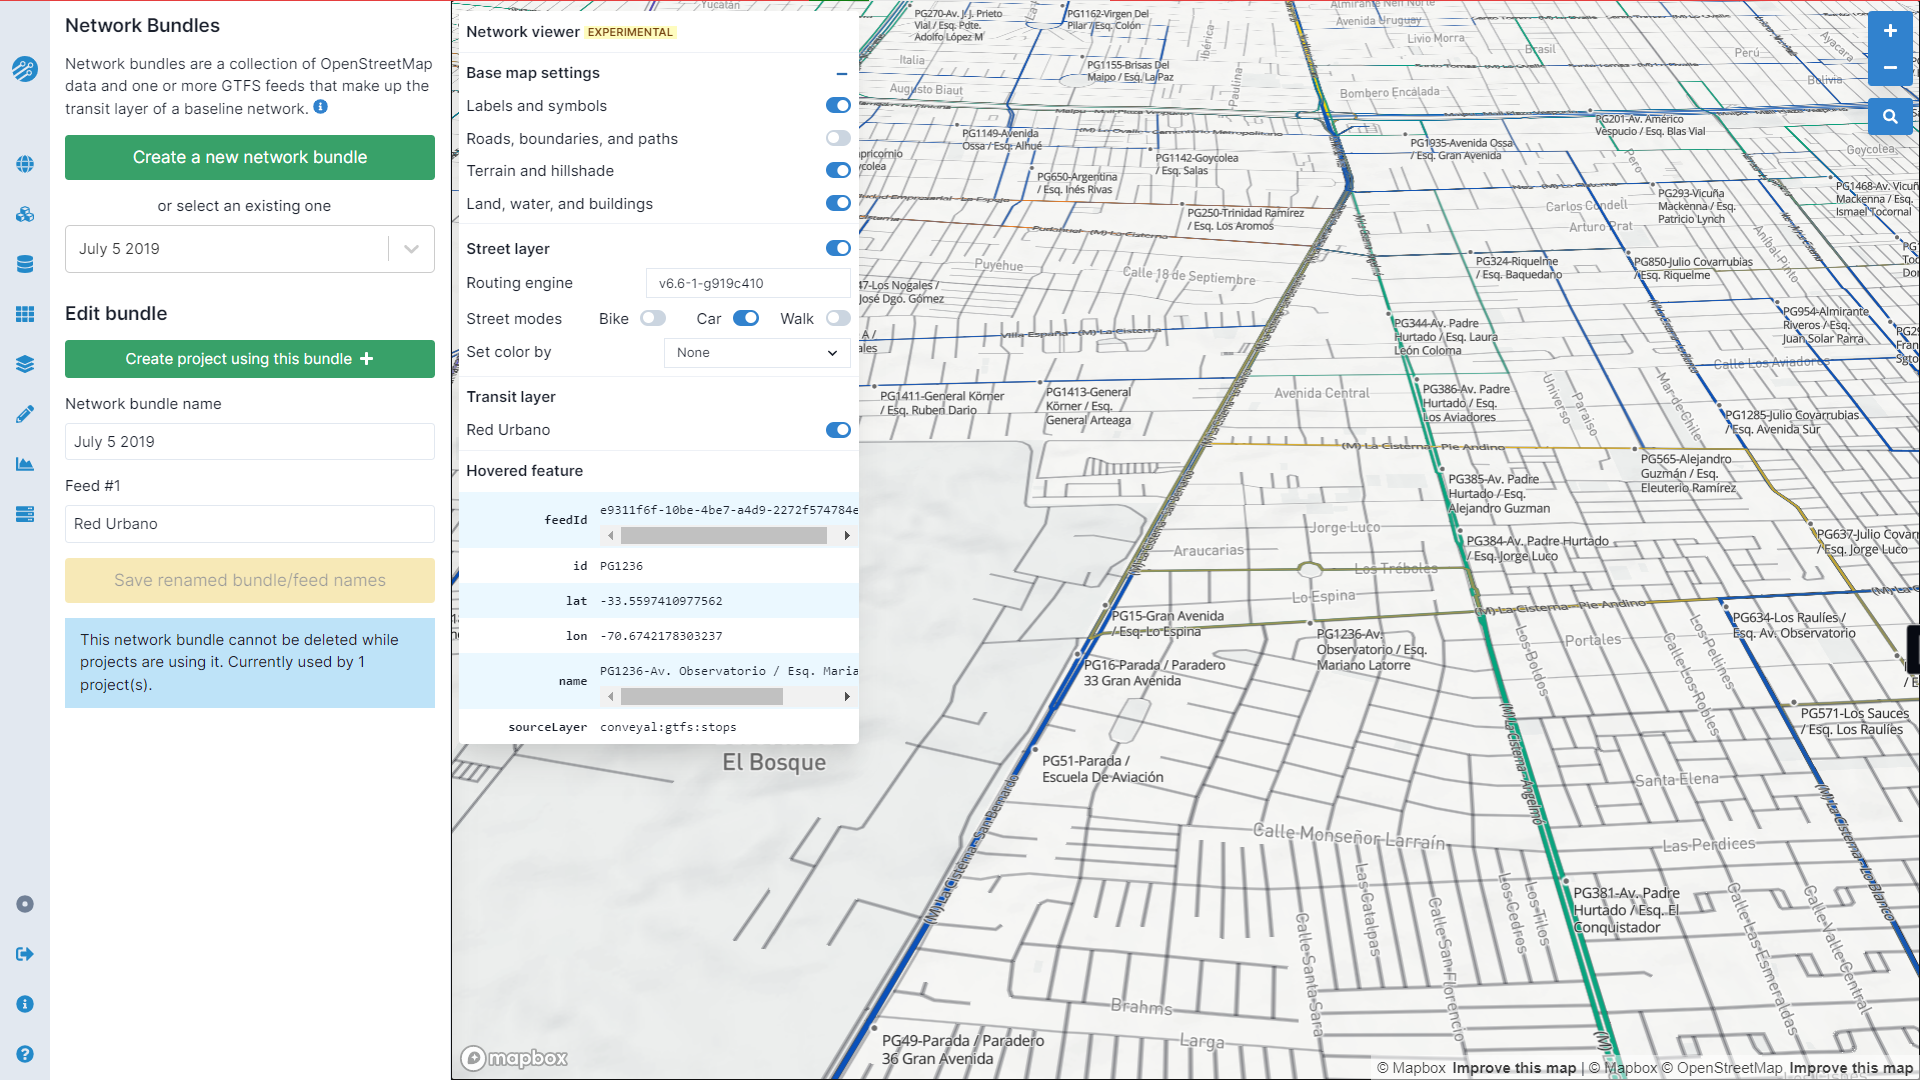
Any custom options set in the network can be viewed in the read-only "Bundle configuration" section in the left sidebar. If you need to change any of these options, you can create a new network bundle that re-uses the same OSM and GTFS, pasting the modified options into the advanced configuration section for the new network.